Kernel Security
In computing, the kernel is the main component of most computer operating systems; it is a bridge between applications and the actual data processing done at the hardware level. The kernel responsibilities include managing the system resources (the communication between hardware and software components)(1)
Operating system tasks are done differently by different kernels, depending on their design and implementation. While monolithic kernels execute all the operating system code in the same address space to increase the performance of the system, microkernels run most of the operating system services in user space as servers, aiming to improve maintainability and modularity of the operating system . A range of possibilities exists between these two extremes.(Figure 1).
Operating system tasks are done differently by different kernels, depending on their design and implementation. While monolithic kernels execute all the operating system code in the same address space to increase the performance of the system, microkernels run most of the operating system services in user space as servers, aiming to improve maintainability and modularity of the operating system . A range of possibilities exists between these two extremes.(Figure 1).

Figure 1. Kernel role in a computer
This paper introduces concepts of the security kernels as well as two examples of them: Kernelized Security Operating System and Honeywell Secure Communications Processor. The security kernel is a methodology that provides the functionality of the operating system and good internal security in multiuser systems. They are especially useful in organisations where different users are trusted on different levels. Also, security kernels are able to co-operate over networks which is very important nowadays.
Principles of Security Kernels
The security kernels can be divided into two categories: actual security kernels and trusted computing bases (TCB). The security kernel is defined as an isolated portion of a computer system that is designed to enforce the security policy of the system. A TCB is defined as the totality of hardware and software protection mechanisms responsible for enforcing the security policy of a given system. The difference is small and often security kernels and TCBs are viewed as synonymous. However, the little difference is that security kernels involve an isolated portion of a system architecture for security functions but in TCBs, security functions may be spread throughout various portions of a system. These are discussed in detail later on this chapter.
The security kernels cannot guarantee full protection. They are as efficient as the chosen policy which is discussed. Additionally, they cannot protect system from authorized, careless users. For example, users select quite often easily guessed passwords or write them down which makes the intruder work relatively easy.
Reference Monitor
In the security kernel approach, a very important concept is the reference monitor which is an abstract notation adopted from the models of Butler Lampson. The reference monitor provides an underlying security theory for conceptualizing the idea of protection. In a reference monitor all active entities such as people or computer processes reference to passive entities such as documents or segments of memory using a set of correct access authorizations. Every reference to passive entities or change of authorizations must go through the reference monitor. The access control information is stored into a database and important security events are stored into the audit file (Figure 2).

Security Kernel
Figure 3 illustrates a general purpose operating system with on-line, interactive users. The kernel provides a relatively small and simple subset of operating system functions. The kernel primitives are the interfaces of this subset to the rest of the operating system (supervisor mode). The supervisor primitives provide the general-purpose operating system functions used by the applications.
Usually, an operating system consists of several functional areas such as process management, I/O control, and file system management. Some of the functions are security relevant and they must be placed into the kernel. The rules of policy model, discussed in Section 3, help to identify security relevant functions. Some of the parts of the operating system must be in the kernel because the model requires that these resources are virtual and that their location be hidden from untrusted software. The functions that provide useful common utilities do not manage anything shared among users and those that address denial of service are outside the scope of the security policy and can generally be in the supervisor.

(Figure 3).Structure of kernel-based operating system
Often systems require a security policy that is more specifically tailored to their needs than those defined by the basic security model. This tailored policy is generally exercised on a limited basis for infrequent operations and may apply only under special circumstances or to a special class of users. If this extended policy is implemented into the kernel, usually a set of interfaces that can be invoked by only certain trusted subjects is provided. Trusted subjects have some internal identifier, e.g., a privilege indicator. When a running program has such privileges, it may be able to perform actions not permitted by the access checks built into normal kernel functions.
Trusted subjects may be needed to perform system maintenance such as access policy controlling for untrusted subjects. Sometimes, normal users invoke certain trusted subjects to perform security sensitive functions. For example, since the basic security model does not allow an untrusted subject to lower the access class of information, the occasional need for downgrading a segment that a user accidentally over-classifies is satisfied by providing a trusted subject for the user. Trusted subjects are often implemented as asynchronous processes, called trusted processes, or as extensions of the kernel itself, called trusted functions. Regardless of the implementation technique, trusted subjects must adhere to the same engineering principles as the kernel if the security policy is to be correctly implemented. Other than the implementation technique, the only difference is the specific security policy enforced.
Defend against kernel malware
Kernel malware, commonly known as rootkits, are malicious applications that run in the kernel of the OS with absolute rights to system resources. End user devices infected with this type of application are open to undetectable processes that can steal data, collect PII, and otherwise control the system regardless of the presence of any anti-virus or personal firewall software.
How kernel malware works
According to Kimmo Kasslin at F-Secure, there are two types of kernel malware infections in Microsoft Windows environments: full-kernel and semi-kernel (Kernel Malware: The Attack from Within 2006). Before jumping into a description of each, it is important to review how Windows memory is managed from a system protection perspective (Figure 4).

Figure 4. Kernel malware work mode
Windows applications run in one of two modes: kernel mode or user mode. Kernel mode applications perform tasks such as accessing hardware resources on behalf of a user application. These applications typically have privileged access to system resources. Because of this, user applications are run in user mode to protect the integrity of the operating system. User mode applications, like word processors and Internet browsers, are unable to directly access hardware or protected OS services. Rather, they must make calls to kernel libraries or drivers that ensure resource requests are executed on behalf of the user applications. This separation of processing tasks is enforced at the hardware level. Kernel malware circumvents this abstraction of privileges by running in kernel mode with direct access to all system services. In other words, it has complete control of the infected system. One attack vector is the installation of a malicious driver.
Malware running in full-kernel mode performs all tasks within the kernel layer. Although it might need a little help from the user to get installed, once operational it performs its assigned tasks without further user intervention.
Semi-kernel mode malware runs in both user mode and kernel mode. One method of deployment consists of placing a .dll or .exe in user mode with access to a kernel mode driver.
According to Kasslin, there is a rise in popularity of kernel malware that coincides with the move of cyber criminals to a hacking-for-profit model. The advantage to criminals is that kernel malware is usually undetectable when using standard antivirus and antispyware applications.
Mounting a defence
The first line of defense is denying the local administrator access to PC users. If an attacker can’t take advantage of user privileges to install kernel-based software, the level of effort required to compromise the PC might be high enough to encourage him to find a softer target. In addition, management should ensure user awareness of the dangers of clicking on unknown links and consenting to the installation of unauthorized software.
Another important control is the implementation of a personal firewall on all workstations. This can help prevent self-propagating infections from spreading. It should be coupled with a strong patch management process. Patching helps eliminate software flaws that can be used to inject malicious kernel code.
Also, consider prohibiting the installation of any unsigned drivers. Installation of malicious drivers is a favorite method of placing kernel malware on target systems.
KERNEL SECURITY IN WINDOWS
Today you will come to know about how to secure the kernel by implementing some security level in windows for which you can use these given main security points below:
* Put Password on Power On Password in the system.
* Put Password on BIOS.
* Deep-Freezer
BIOS PASSWORD SETUP (For Kernel Security)
BIOS History
In IBM PC compatible computers, the Basic Input/output System (BIOS), also known as the system BIOS or ROM BIOS is the de facto standard defining a firmware interface. The name originated from the Basic Input Output System used in the CP/M operating system (released in 1976), where the BIOS was loaded from disk, with only a small boot loader program stored in read-only memory.
The BIOS software is built into the PC, and is the first code run by a PC when powered on (boot firmware). When the PC starts up, the first job for the BIOS is the power-on self-test, which initializes and identifies system devices such as the CPU, RAM, video display card, keyboard and mouse, hard disk drive, optical disc drive and other hardware. The BIOS then locates boot loader software held on a peripheral device (designated as a boot device), such as a hard disk or a CD/DVD, and loads and executes that software, giving it control of the PC. This process is known as booting, or booting up, which is short for bootstrapping.
A BIOS has a user interface (UI), typically a menu system accessed by pressing a certain key on the keyboard when the PC starts. In the BIOS UI, a user can:
* configure hardware
* set the system clock
* enable or disable system components
* select which devices are eligible to be a potential boot device
* set various password prompts, such as a password for securing access to the BIOS user interface functions itself and preventing malicious users from booting the system from unauthorized peripheral devices.
The role of the BIOS has changed over time. As of 2011, the BIOS is being replaced by the more complex Extensible Firmware Interface (EFI) in many new machines, but BIOS remains in widespread use. EFI booting has been supported in only Microsoft Windows versions supporting GPT [2], the Linux kernel 2.6.1 and later, and Mac OS X on Intel-based Macs [2]. However, the distinction between BIOS and EFI is rarely made in terminology by the average computer user, making BIOS a catch-all term for both systems.
The first BIOS virus was CIH, whose name matches the initials of its creator, Chen IngHau. CIH was also called the “Chernobyl Virus,†because its payload date was 1999-04-26, the 13th anniversary of the Chernobyl accident.
CIH appeared in mid-1998 and became active in April 1999. It was able to erase flash ROM BIOS content. Often, infected computers could no longer boot, and people had to remove the flash ROM IC from the motherboard and reprogram it. CIH targeted the then-widespread Intel i430TX motherboard chipset. The then-widespread Windows 9x operating systems allowed direct hardware access to all programs.
Modern systems are not vulnerable to CIH because of a variety of chipsets being used which are incompatible with the Intel i430TX chipset, and also other flash ROM IC types. There is also extra protection from accidental BIOS rewrites in the form of boot blocks which are protected from accidental overwrite or dual and quad BIOS equipped systems which may, in the event of a crash, use a backup BIOS. Also, all modern operating systems such as Linux, OS X, Windows NT-based Windows OS like Windows 2000, Windows XP and newer, do not allow user-mode programs to have direct hardware access. As a result, as of 2008, CIH has become essentially harmless, at worst causing annoyance by infecting executable files and from antivirus software. Other BIOS viruses remain possible, however; [2] since most Windows home users without Windows Vista/7’s UAC run all applications with administrative privileges, a modern CIH-like virus could in principle still gain access to hardware without first using an exploit. The operating system OpenBSD prevents all users from having this access and the grsecurity patch for the linux kernel also prevents this direct hardware access by default, the difference being an attacker requiring a much more difficult kernel level exploit or reboot of the machine.
What is BIOS?
A BIOS password will make sure you need to enter a password when you make changes to the BIOS settings.
The most basic BIOS password will prevent people from making changes to your BIOS settings. In the BIOS you can define the boot order of hardware. In practice this means you tell the computer that you want him to look for bootable data in a certain order (e.g. Floppy -> DVD -> HDD). After your computer is first installed you probably want to only allow it to boot from you hard disk and disallow to boot from USB or DVD. Removing these from the boot order will also speed up the boot process of your computer since he will not be checking these devices for bootable media.
Normally you will not have a need to boot regularly from DVD or USB since you could just as well install these operating systems on virtual systems. Once your PC has been properly set up the only reason to boot from other media would be in case of restoring a failing computer (e.g. Windows Rescue Disks) or if your computer has a failing hard disk. When this is the case you just go to the BIOS settings, change the boot order to include DVD or USB, enter the password and reboot.
Preventing changes to the boot order and removing DVD and USB (and floppy or anything else than hard disk) from the boot order will make sure your computer boots the OS as you have it installed and not something else. An attacker would need physical access in order to put some kind of media in your computer (e.g. A DVD disk).
There are some BIOS manufacturers that also allow putting a password in the BIOS that is needed or simply booting the computer, you need to enter this password every time you boot the computer no matter what media you boot it from. You could compare this to the login screen you might have to log into the OS after booting.
When do we need this?
I would advice that a BIOS password be set for all laptops because it enhances the security level on Kernel Layer so that any individual can bypass it easily. Laptops are designed to be carried and are often left alone (e.g. in your hotel room) in places where you have little control over the people that have access. I would also advice to do it on all computers that are in public places or places where there is little or no control on who has access or where lots of people have access (e.g. workplaces).
Setting up Power-On Password
Before the Windows 7 (or any other OS) operating system loads, the computer goes through a brief procedure known as the Power-On Self-Test. This function makes an inspection of any changes made to the hardware installed on your computer. The Basic Input Output System stores the settings pertaining to such hardware. In addition, you may set a user password that takes place before said inspection, which also prevents the operating system from loading.
Step 1
Turn on your Windows 7 computer. Access the BIOS screen by pressing the appropriate keyboard key, which generally varies by motherboard make and model.
Step 2
Go to the BIOS Security Privacy section. While the layout presented greatly depends by its Motherboard manufacturer, all information and settings are generally similar (Figure 5).

Figure 5. Configure Power-On Password
Step 3
Enter the desired Power-On password, and re-type it into the confirmation field if necessary.
Step 4
Exit the BIOS menu through its respective Save and Exit function, typically executed by pressing F10 on your keyboard (Figure 6).

Setting up BIOS Password
Your computers BIOS is the first program that is run when your computer starts. You can tell the BIOS to ask for a password when it starts, thus restricting access to your computer.
To enter the BIOS setup program, sometimes called CMOS setup:
Turn on or reboot your computer. Than press F8 and one screen will display a series of diagnostics and a memory check.
A message like Hit the <DEL> key to enter the BIOS setup program will appear.
When you do hit DEL at the right time youl see a menu screen something like this: Figure 7.

Figure 7. BIOS Setup
Note
Some BIOS versions use a graphical type menu with icons (a GUI) or have a text interface that appears different to the one shown, the principle however is exactly the same.
As you can see there are two options that relate to passwords, Supervisor Password and User Password, these relate to controlling access to the BIOS Setup Program and the Machine Boot respectively.
Note that not all BIOS have this password feature; your bios may not have it in which case you wont be able to restrict access to your computer in this way.
Select SUPERVISOR PASSWORD and you be prompted to enter a password:
You should now enter a password of up to eight characters (most BIOS are limited to eight characters unfortunately). I recommend you use the full eight but take care that you choose something you not forget.
The BIOS will then prompt you to confirm the password, just type the same thing again (Figure 8).

Figure 8. Set password on Supervisor Password
Now you want to set your system to ask for that password every time it boots, so select the BIOS FEATURES SETUP option, to see a menu something like this:
Fairly obviously, the Password Check option are interested in, so select it and change the setting to ALWAYS.
Now navigate back to the main menu and select SAVE & EXIT SETUP. Your machine will then reboot and you will be prompted for the password (Figure 9).

Each and every time you boot you will be asked for password you chose (Figure 10).

Figure 10. BIOS Login Screen
Please note that this method of restricting access to your computer is not completely full proof, there are ways around it. But it will stop or at least delay the majority of casual attempts to get access.
If you forget your BIOS password, consult your motherboard manual or if you dont have one, consult the website of the BIOS manufacturer.
It is not always the DEL key some BIOSs use F2 or F10 or another key combination, check your motherboard manual.
Ways to defeat BIOS passwords?
There are many ways to defeat a BIOS password:
* remove the CMOS battery to clear the password
* reset the jumpers for the BIOS to clear the password
* try one of the master BIOS passwords to bypass the user placed BIIOS password
* use a BIOS password cracking utility
As you notice all these actions will require physical access to the computer and in case of removing the battery or using the jumpers on the motherboard to clear the password the attacker would even need to open your computer. You cannot update a BIOS remotely on normal computer hardware, you can on some servers but to my knowledge that requires extra hardware to be installed on the said server. Most of these actions also take time (the exception being the master or generic passwords that manufacturers put in as back doors)
Conclusion
A BIOS password is a good investment since it takes very little time or knowledge to set up and it might stop an attacker since he will need a certain amount of time to get past the BIOS password (opening the computer or looking at the manufacturer and then trying possible master passwords takes time). Also if the BIOS password is cleared it will be visible to you that an attack on your system has happened and you can take appropriate action.
If your BIOS allows you to set a password that is required for booting the computer I would certainly use that option, it will take an extra step to log in (you need to enter the password) but it does add an extra hurdle and more time for an attacker to gain access to your computer.
I firmly believe security should be layered and there should always be more than one level of protection on each functionality of your computer. Therefore, a BIOS password will always be a good investment. The fastest possible way I see an attacker getting past this security measure would include him knowing you use a BIOS password, a first investigation on what the manufacturer of your BIOS is, a search for the manufacturer master password(s) (it is possible that there are none for your BIOS) and then he needs physical access to your computer to (re-)boot, change the BIOS settings (using the password), reboot from other media, do his evil stuff, reboot and change the BIOS settings back to the original settings, reboot and put the computer back in the state it was when he found it (probably powered down). I think this would take 10 minutes at the least.
Hiren Live CD Tool - A way to hack BIOS Password
Hiren is a Live CD Tool by which you can crack BIOS Password. I am telling you some steps by which you can crack it by using it. For cracking your system BIOS password you are supposed to follow these given steps which you will find in pictures step by step.
Step 1
Put Hiren Live CD tool into CD-Rom and reboot your system.
Step 2
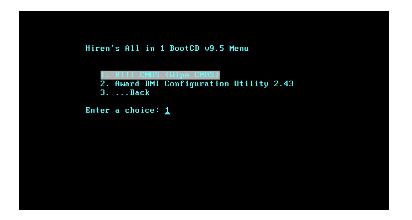
You have to choose 2nd option Start BootCD (Figurte 11).

Figure 11. Start Hiren Live CD tool
Step 3
Choose 9th option for next (Figure 12).

Figure 12. Select option 9 for next
Step 4
Choose 2nd option for BIOS/CMOS Tools. (Figure 13).

Figure 13. Select option 2 for BIOS/CMOS Tools
Step 5
Choose 8th option for More (Figure 14).

Figure 14. Select option 8 for More
Step 6
Choose 1st option for Kill CMOS (Wipe CMOS) (Figure 15).
Step 7
Select yes for cracking your BIOS password (Figure 16).

Figure 16. Final process to kill CMOS information
You will be successful in cracking the BIOS Password by following these steps.
Deep-Freezer Tool
Deep Freeze works on Kernel Layer and helps eliminate computer damage and downtime by making computer configurations indestructible. Once Deep Freeze is installed on a computer, any changes made to the computer – regardless of whether they are accidental or malicious – are never permanent. DeepFreeze provides immediate immunity from many of the problems that plague computers today – inevitable configuration drift, accidental system misconfiguration, malicious software activity, and incidental system degradation.

Figure 17. Deep-Freezer Introduction
System Requirements
Deep Freeze protects the computers that are set to boot from the hard drive. Configure the CMOS to boot from the hard drive only. The CMOS must be password protected to prevent unauthorised changes. Deep Freeze protects the Master Boot Record (MBR) when the computer is frozen.
Attended Install
Complete the following steps to perform an attended install.
* Double-click DFStd.exe to begin the installation process (Figure 18).

Figure 18. Deep-Freeze installation step 1
* Click Next. Click I agree to the terms in the License Agreement. Click Next (Figure 19).

Figure 19. Accept License Agreement for installing purpose
* Enter the License Key or select the Use Evaluation check box to install Deep Freeze in Evaluation mode (Figure 20).

Figure 20. Put License Key or use Evaluation for Demo mode
*Choose the drives to Freeze from the displayed list. Click Next (Figure 21).

Figure 21. Select Drive for implementing Deep-Freezer effect
* Click Install to begin the installation.
The computer restarts immediately after the installation is complete.
Install Using Imaging
Deep Freeze has been designed to work with all major imaging and desktop management software. Use either an Attended Install or the Silent Install to install Deep Freeze on a master image.
Deep Freeze must be prepared for deployment before finalizing a master image. To prepare the master image for deployment complete the following steps:
* Restart the computer into a Thawed state.
* Launch Deep Freeze using the keyboard shortcut CTRL+SHIFT+ALT+F6. Alternatively, press
* SHIFT and double-click the Deep Freeze icon in the System Tray.
* Enter the password and click OK.
* Click Set Flag in the Status tab.
* The message The flag has been set successfully. Do you want to reboot your computer now?
Is displayed. Click Yes to reboot the computer immediately. Click No to reboot the computer
later.
After imaging, the computers require an additional restart for Deep Freeze to correctly detect the changes in disk configuration. If the computers are imaged in an unattended mode, steps should be taken to ensure the computers are restarted to allow the configuration to update.
KERNEL SECURITY IN LINUX
Kernel Security through password protect GRUB ENTRIES
Boot loader is a software code that runs before the Operating System and helps in loading the Operating System. Boot loaders usually contain several ways to boot the Operating System kernel and also contain commands for trouble-shooting or passing some values to the kernel while booting.
When a computer with Red Hat Enterprise Linux is powered on, the Red Hat Enterprise Linux Operating System is loaded into memory and started by a boot loader. A boot loader program is located on the system’s primary hard drive and the boot loader has the responsibility of loading the Linux kernel with its required necessary files into the computer’s memory.
Red Hat enterprise editions for different hardware architecture use different boot loaders. The following table shows the different boot loaders for different hardware platforms (Table 1).
Table 1. A sample grub.cof file.

The GRUB (GNU GRand Unified Boot loader) is the default boot loader for AMD32, AMD64, Intel x86 and Intel EMT64T based hardware platforms. GRUB (GNU GRand Unified Boot loader) enables the selection of the installed operating system at boot time. GRUB also allows the user to pass arguments to the kernel while booting.
Linux Booting Levels
1. The Stage 1 or primary boot loader is read into memory by the BIOS from the Master Boot Record (MBR). The primary boot loader exists on less than 512 bytes of disk space within the MBR and is capable of loading either the Stage 1.5 or Stage 2 boot loader.
2. The Stage 1.5 boot loader is read into memory by the Stage 1 boot loader.
3. The Stage 2 or secondary boot loader is read into memory. The secondary boot loader displays the GRUB menu and command environment. This interface allows the user to select which kernel or operating system to boot, pass arguments to the kernel, or look at system parameters.
4. The secondary boot loader reads the operating system or kernel as well as the contents of /boot/sysroot/ into memory. Once GRUB determines which operating system or kernel to start, it loads it into memory and transfers control of the machine to that operating system.
5. init program is initiated and it will read the inittab file (/etc/inittab) and set up the appropriate run level.
Working with grub.conf configuration file
A sample grub.cof file is shown Listing 1. The lines beginning with a # are comments.
Listing 1. grub.cof Shellcode
### Beginning of grub.conf ###
# grub.conf generated by anaconda
#
# Note that you do not have to rerun grub after making changes to this file
# NOTICE: You have a /boot partition. This means that
# all kernel and initrd paths are relative to /boot/, eg.
# root (hd0,0)
# kernel /vmlinuz-version ro root=/dev/sda2
# initrd /initrd-version.img
#boot=/dev/sda
default=0
timeout=5
splashimage=(hd0,0)/grub/splash.xpm.gz
hiddenmenu
#####First Operating System#####
title Red Hat Enterprise Linux Server (2.6.18-8.el5)
root (hd0,0)
kernel /vmlinuz-2.6.18-8.el5 ro root=LABEL=/ rhgb quiet
initrd /initrd-2.6.18-8.el5.img
#####Second Operating System#####
titleRedHat Operating System 2
root(hd1,0)
kernel /vmlinuz-2.6.18-8.el5 ro root=/dev/sdb2 rhgb quiet
initrd /initrd-2.6.18-8.el5.img
### End of grub.conf ###
The grub.conf configuration file is explained in detail below.
* The default=0 directive points to the first stanza, which is the default Operating System to boot.
* The timeout=5 directive specifies the time, in seconds, for GRUB to automatically boots the default operating system.
* The splashimage directive locates the graphical GRUB screen.
* The hidden menu directive means that the GRUB options are hidden.
A stanza begins with a title, (the text to be displayed in boot menu for selecting the Operating System) and the next three lines specify the location of the /boot directory, the kernel, and the initial RAM disk (The initial RAM disk (initrd) is an initial root file system that is mounted prior to when the real root file system is available), respectively.
* root (hd0,0) – Specifies the boot directory is in first hard disk, first Partition.
* kernel /vmlinuz-2.6.18-8.el5 ro root=LABEL=/ rhgb quiet – Specifies the kernel location which is inside the /boot folder. This location is related to the root(hd0,0) statement. The “ro†option specifies the kernel should be opened as read only to protect it from any accidental writes from the initial RAM disk and “rhgb†enables the Red Hat Graphical boot option. initrd /initrd-2.6.18-8.el5.img“ Initial RAM disk.
Setting up GRUB password in Linux
GRUB security features allow you to lock down the editing of boot options accessed by pressing the key and they allow you to password protect selected or all boot entries.
Follow the steps below to see how to password protect GRUB entries:
Fire up the terminal. Type grub and press enter. The prompt would change to something like
grub>.
Enter md5crypt at the GRUB prompt. Type in the password when prompted for and press enter. The command will return you password encrypted as an md5 hash. You will need this so make a note of it or copy to the clipboard (Figure 22).

Figure 22. Putting password on GRUB
* Now we need to edit the /boot/grub/menu.lst file. You are advised to make a backup of the file before editing it in case something goes wrong (Figure 23).

Figure 23. Making password backup
Enter the line password “md5 <the copied md5 string from step 3> before the line that reads: BEGIN AUTOMAGIC KERNEL LIST (actually it just needs to come before any of the boot menu entries, so you can write it anywhere as long as it is before them).
If you save the file at this moment without any further edits you would have locked down interactive editing in GRUB. The administrator or in this case you would have to press key and enter the correct password to access these advanced options.
If in addition you want to lock down specific menu entries so that anyone without the knowledge of the correct password cannot boot into that operating system you should add the word lock all by itself on a separate line just after the title specification for each entry in the menu (Figure 24).

Figure 24. Securing kernel Layer through grub.conf file
The next time anyone tries to select the locked menu entry he/she will be required to enter a password before he/she can boot into the corresponding operating system.
To lock the recovery mode entries it is best to change the line lockalternative=false to lockalternative=true. This will lock down all future recovery mode entries as well even if you update the kernel.